
At long last, it’s time to get your reports in SharePoint! Here comes the manual labor, otherwise known as the “I know I won’t be short on stuff to do today” section.
Here’s an overview of the main migration steps:
- Create the necessary shared data sources for the report on the SharePoint site reports library
- If you’re using ODBC connections, don’t forget to set up the DSN’s on your SharePoint servers!
- Open a copy of the existing report in Report Builder or SSDT
- Edit the report data source(s) to point to the applicable SharePoint data source
- Save the report to the SharePoint reports library
- Edit the report’s properties and apply the correct Report Category and any other metadata being tracked
Create a Shared Data Source
The components of a shared data source in SharePoint are much the same as they are in Native Mode SSRS, so I’ll refer you to the Microsoft documentation for the basic steps of creating one. However, here are some gotcha’s we discovered:
- Once we created and saved a Report Data Source, the content type still remains “Report Builder Report”. If the properties were manually edited to set it back to “Report Data Source”, the content type stuck and no further action was needed. I don’t know if this is a quirk of our implementation, but it’s been an issue in both SharePoint 2010 and SharePoint 2013. The data source still works, but until you reclassify its content type, it will keep showing up in views restricted to show content of type “Report Builder Report”.
- In Native Mode Report Manager, the name of the data source displayed when you manage a report’s data source is taken from the shared data source’s name. In SharePoint, the data source name displayed is taken from the RDL. Why does this matter?
- Shared Data Sources usually follow some kind of naming convention that explains what they are.
- Data sources within reports often end up with the name “Datasource1”.
- When you need to debug a broken report based on the error message it’s displaying, “ERP_Prod” is a lot easier to understand than “Datasource1”.
- SharePoint does let you click through to get the URL of the data source the report is using, so all is not lost, but the migration might be a great time to remind report authors to name their data sources something other than Datasource1.
Migrate a Report to SharePoint
- Open a saved copy of a report from your native mode instance of SSRS in your tool of choice, Report Builder or BIDS/SSDT. These examples will show Report Builder screenshots.
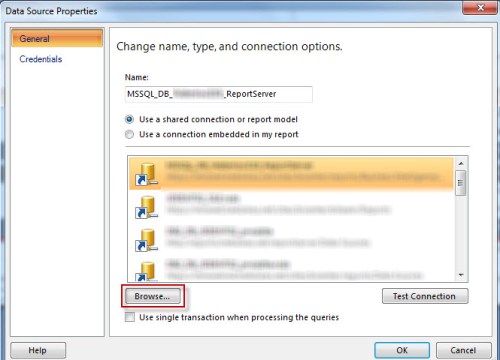
- Expand the data sources folder and double-click on the first one you need to change
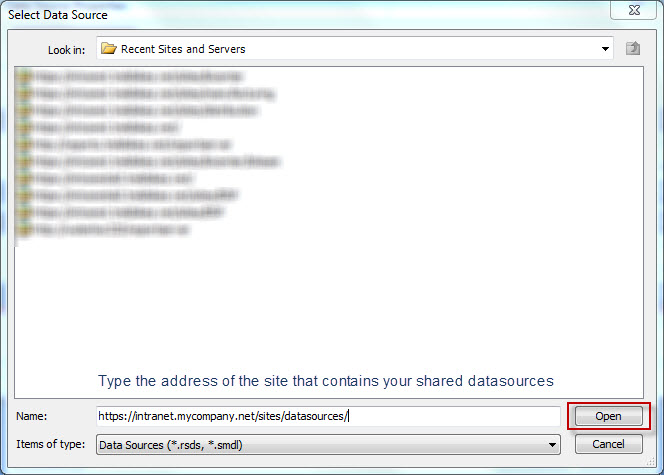
- Click the Browse button
- Type the URL of the SharePoint site that stores your shared data sources into the “Name” field and click Open.
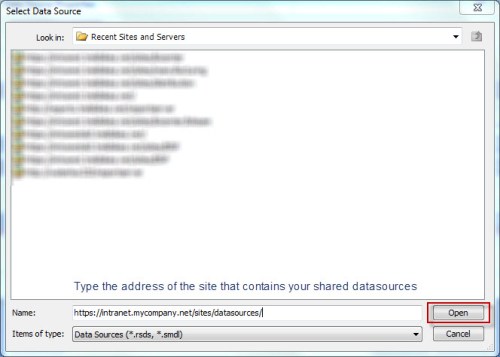
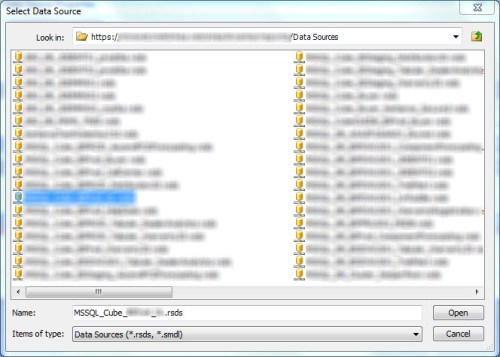
Once you’ve navigated to this site once in this manner, it will appear in your Recent Sites & Servers for faster navigation - Browse to the SharePoint equivalent for the report’s data source, select it, then click Open
- Click OK back at the Data Source Properties window.
- Repeat the re-pointing of the data source for each data source in the report.
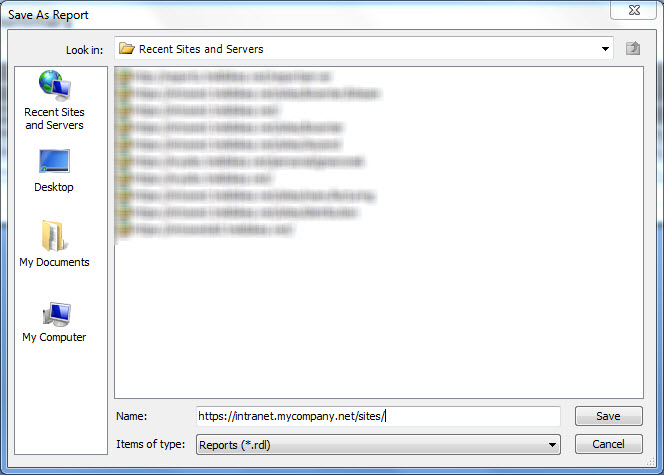
- Perform a “Save As” in your report tool
- Type the URL of the site that will host this report in the Name field and hit Enter
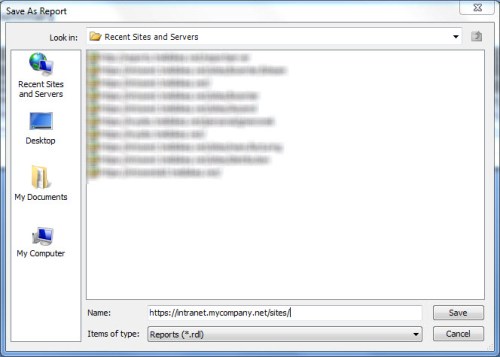
Once you’ve navigated to the site once, it will show up in your Recent Sites & Servers for faster navigation. - Browse to the Reports library under the site
- Save the report
- Preview the report to test it to make sure that it renders. For example, if you have a report on SharePoint with a data source still on native SSRS, you’ll get a “The shared data source <name> for the report server or SharePoint site is not valid” error.
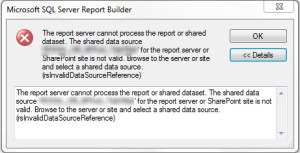


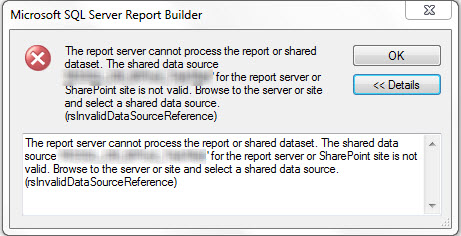
Fix the data source to point to its SharePoint equivalent and you’ll be good to go!
Assign Report Metadata
Sure, it’s good to have a report running in a SharePoint library, but if all you do is re-point the data source and save it in the SSRS library, you’re missing out on the extra functionality available when you assign metadata to the reports. For example, when you fill in a report’s category, you open up options for how to group the display of the reports via custom views. Filling in the report’s title ensures that the report will show up in a friendly way in various Search views. Make sure you complete this important final step – it’s worth the extra effort.
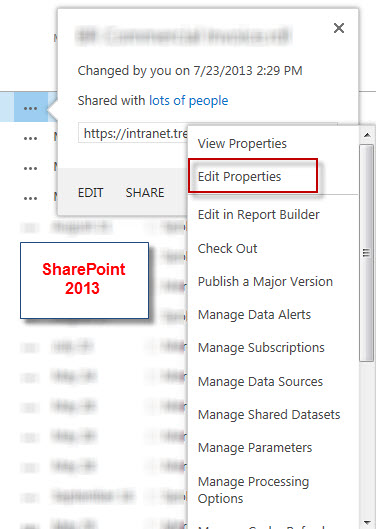
- Navigate to the SharePoint reports library (ex. https://intranet.mycompany.net/sites/reports )
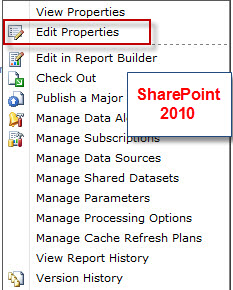
- Hover over a report to display the down arrow or ellipses button
- Click on the button to display the context menu


- Copy the Report Name into the Report Title field. If this name need to be made more user friendly, insert spaces and capitalize where necessary.
- Choose the applicable Report Category and Save your changes.
Congratulations, you now have a report fully configured and running in SharePoint! Soon it will be time to test, subscribe, and get ready to cutover from native mode.
